How often should you clean your dryer vent?
By Jordana Weiss•Last updated Aug 10, 2023
Last updated Aug 10, 2023
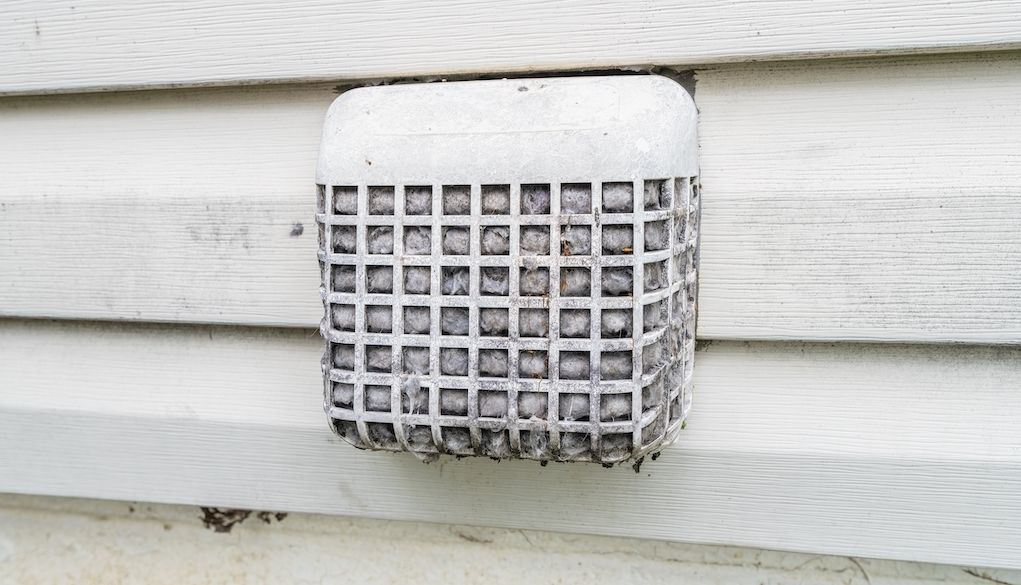
Like any household appliance, your clothes dryer is most effective when it’s clean and in good working order. When it’s not working properly, it can be inconvenient — and even dangerous. One of the biggest culprits responsible for dryer fires is a blocked dryer vent that needs to be cleaned.
Avoid dryer fires and malfunctions by cleaning your dryer vent at least once a year. Some experts even recommend doing it twice a year, or about every six months.
Why it’s important to clean your dryer vent
Cleaning your dryer vent is an important way to help keep your home safe.
When you don’t clean your dryer vent regularly, lint and debris build up. These byproducts are highly flammable, and they can easily cause a fire in your laundry room.
Additionally, when the dryer vent is blocked, it works harder to dry your clothes. This can burn out the heating element and put extra wear and tear on the machine, shortening its lifespan. Some companies even require homeowners to clean their dryers every year as a condition of the warranty.
How do I know if my dryer vent needs cleaning or is clogged?
Cleaning your dryer vent at least once or twice a year is essential, whether or not it seems to need it. This helps keep your dryer ducts clean and in good working order.
However, there are some signs that a more frequent cleaning schedule is needed:
- Your clothes take longer to dry than usual.
- You notice a burning smell.
- Your dryer is suddenly hot to the touch.
- You notice a lot of lint buildup.
- There’s more residue than usual in your dryer lint trap.
If you notice any of these signs and don’t want to clean a dryer vent yourself, contact a dryer vent cleaning specialist.
How to clean your dryer vent in 5 steps

If you're handy and have a few tools, you can clean your dryer vent yourself. Check your owner's manual for guidance first, but here are the basic steps to follow:
Step 1: Collect your tools.
Cleaning your dryer vent requires a few specialized tools, along with some you probably already have at home. For a thorough vent cleaning, you’ll need:
- A screwdriver
- A vacuum or shop vac
- A dryer duct cleaning kit
These kits come with a variety of flexible brushes that let you reach deep into the ductwork and remove lingering lint and debris.
Step 2: Pull your dryer away from the wall and detach all connections.
This is essential to make sure you don’t damage the dryer or hurt yourself while you work. Pull your dryer away from the wall so you have room to work, then unplug the power cord from the socket.
If your dryer is gas-powered, turn the valve to shut off the gas. Then disconnect the large flexible duct hose from the wall. You may need to use your screwdriver if there’s a clamp on the duct.
Step 3: Remove lint from the duct.
If there's visible lint on either the wall side or the dryer side of the vent opening, remove it with your hands. Then use your vacuum or shop vac to draw out additional lint. Get in as deep as possible, using the hose or extensions on your vacuum.
Step 4: Clean your vent with dryer brushes.
Once you’ve removed as much lint as you can with a vacuum, use your dryer brushes to give the ductwork a more thorough cleaning. Go gently at first, feeding the long brush into the vent slowly while rotating it so it scrapes the vent clean as you go.
Step 5: Clean up the mess and reconnect your dryer.
Once you’ve thoroughly cleaned your dryer vent, clean up all the debris you loosened. Then reattach the connections, including the dryer vent and the clamp, if you have one, along with the power connection, whether electrical or gas.
Once your dryer is reconnected, run a quick test load. Select a light setting like fluff or air dry, which can help shake out any remaining debris.
Don’t want to DIY? Hire a dryer vent cleaning professional.
If this DIY dryer maintenance sounds a bit intimidating, don’t worry. There are plenty of pros who can handle this job for you.
How it works.

Search.
Browse profiles, see prices and use filters to find pros who match your project.

Chat.
Contact the pros you like to discuss project details.

Hire.
Check pro availability and book appointments right in the app.
Find local pros for your project
Tell us what you're looking for and we'll show you pros right for the job, with prices.