Find local pros for your project
Tell us what you’re looking for and we’ll show you pros right for the job, with prices.
Updated
By Jordana Weiss
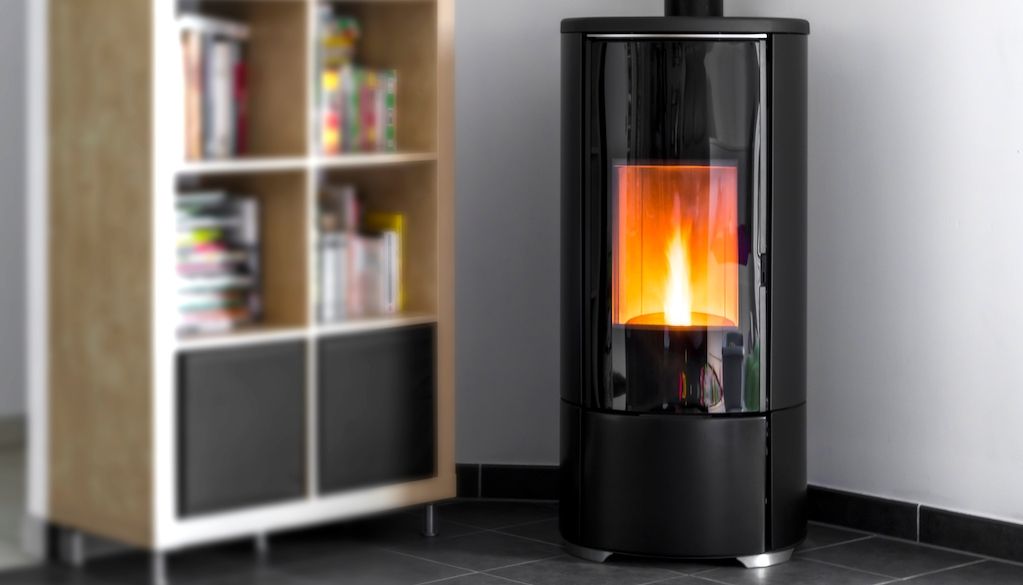
Pellet stoves may not be in widespread use. But their simple operation and reliance on clean-burning fuel have made them an easy choice for many homeowners.
Once a pellet stove is installed, it uses electricity and the combustion of pellets to generate heat. While they may look like mere wood pellets, the pellets are actually made of biomass — which is typically a combination of sawdust, wood shavings, food waste, and other organic material. This means they burn much cleaner and with less waste than material used in regular wood stoves.
If you decide this type of heat source is the right choice for your home, you can install the pellet stove yourself. However, it will require fairly advanced knowledge of carpentry. Installing a freestanding pellet stove requires cutting a hole in the interior wall through to the exterior for the vent. Your local area may also have specific code requirements for ventilation.
If you don’t feel comfortable taking on this level of DIY work yourself, hire a local installation professional. Otherwise, keep reading to see step-by-step installation instructions.


You may need more tools depending on your final installation location and how far you have to go to get the vent pipe to the exterior of your home.
Note: Think carefully through the installation process before you start. Any mistake can lead to serious consequences like a house fire or carbon monoxide poisoning. If at any point you realize that you’ve gone beyond your expertise, stop and call in a professional.
How much does it cost to install a pellet stove? Get free price quotes from pros near you.
Keep these things in mind when deciding where to put your pellet stove:
The stove’s final location will also depend on the stove's size and the area you want to heat. For a 2,000-square-foot home, you would likely need a stove that’s rated for at least 60,000 British thermal units (BTUs).
To help maximize the stove’s output, it’s recommended that you place it by the exterior wall or alongside a stairwell. This will help encourage warm air to rise into other areas of the home.
It may seem tedious, but there’s no room for error when you’re about to drill a hole in your house. Before you do anything else, read the manual that comes with your pellet stove. It should have a detailed step-by-step guide to walk you through the installation process.
Each pellet stove model has its own requirements. So, ensure you have the tools and parts recommended by your stove’s manufacturer.
You may also need to purchase additional materials before installation, such as a custom length of stainless steel exhaust vent pipe and cap.
Last thing before you begin: review any local codes or permitting requirements before you proceed.
After you’ve read the manual, you can move on to the actual setup process.
First, set up your fireproof hearth pad. Remember, it must extend at least 6 inches in front of your stove and fully cover the base. Once you’re happy with the position of your fireproof pad, put the stove itself in place.
Take a deep breath. Then, cut a hole in your wall for your stove’s exhaust pipe.
You’ll need a reciprocating saw, as well as other tools, depending on the hole’s location and the material composition of your home.
The hole's size will depend on the diameter of the exhaust pipe. Measure the pipe before making any cuts to ensure you don’t cut a hole that's too large.
Next, insert the wall thimble and the exhaust vent piping. Connect the exhaust vent to your stove.
Once the vent material is placed, secure it with screws. Seal all of the joint connections with high-temperature silicone sealant. This ensures that the air intake is joined correctly and that no exhaust escapes the pellet-burning stove.
You’ll also need to finish the exhaust vent on the exterior of your home and cap it safely. This helps ensure no rodents or small animals can use it as an entryway.
After you’ve successfully connected the exhaust vent, plug in the stove and check that it's functional.
In order to use the stove, you’ll need to purchase pellets and load them into the stove’s hopper. The hopper funnels the pellets into the stove, which burns them at high heat to warm your home. Depending on how often you use the stove, you may need to refresh pellets daily.
Installing a pellet stove is a big job — only someone skilled in carpentry and handiwork should do it. To ensure proper stove installation, hire a professional to handle the equipment, tools, and materials, relieving you of any worries.
Download the Thumbtack app to find pros in your area. With Thumbtack, you can read reviews of top-rated pros, see photos of their past projects, and request free price estimates. Start your search today.
Tell us what you’re looking for and we’ll show you pros right for the job, with prices.