How to clean your cast iron stove grates and burners
By Kristy Snyder•Last updated Oct 20, 2023
Last updated Oct 20, 2023
Table of Contents
- What are stove grates and burners?
- Important tips when cleaning cast iron grates and burners
- What you’ll need
- Step 1: Prepare the stovetop
- Step 2: Soak the grates and caps
- Step 3: Scrub away
- Step 4: Rinse and dry
- Step 5: Clean the burners
- Step 6: Put it all back together
- Download the Thumbtack app to find local pros
Find local pros for your project
Search for pros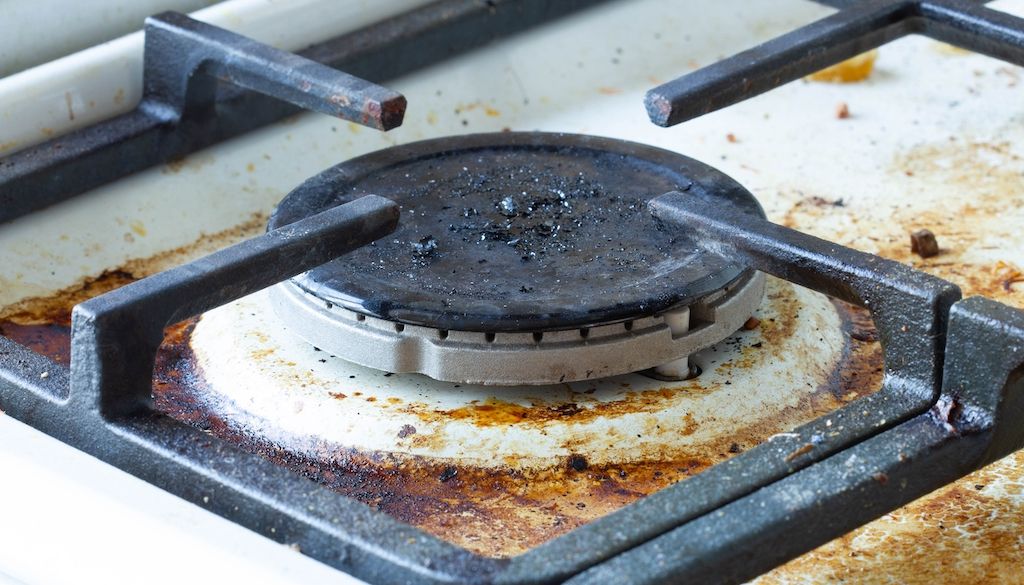
After a while, cooking on your cast iron stove can lead to a buildup of dirt and grime. Sure, wiping off your grates and burners after every meal can help a bit. But what do you do about those burned-on stains? Use these tricks to learn how to clean gas stove grates and burners.
What are stove grates and burners?
Before we begin, here's a quick overview of each part:
- Burners are where gas exits the stove. It ignites in the air to create the flame you cook with.
- Burner caps sit on top of each burner head and spread the flame evenly.
- Grates provide an elevated, level surface for your pots and pans, since you can't set cookware directly in the flame.
- Drip pans, on some models, sit beneath the burners to catch spills.
Usually, grates are made of porcelain-coated cast iron, though some older stoves may have uncoated cast iron. Porcelain-coated cast iron stove grates can help prevent rust and are easy to clean — as long as you know the right tricks. Luckily, we’ll cover how to clean stove burners below.
How to tell which you have
Porcelain-coated grates have a smooth, slightly glossy finish, usually black, and feel glassy under your fingertips. Bare cast iron looks matte gray-black and feels faintly rough or grainy.
Turn a grate over and check the underside and the feet, where coating wears through first — if you see rust-colored or dull metallic patches, the iron is exposed there even if the top looks fine. When in doubt, treat them as uncoated and don't soak.
Important tips when cleaning cast iron grates and burners
- Don't soak uncoated cast iron burners or grates in water. Uncoated cast iron is porous. If you soak it, it may develop rust.
- If you notice chips on porcelain-coated cast iron grates, don't soak them. Inspect your cast iron grates and burners for exposed areas that may rust if soaked in water.
- Season uncoated cast iron grates only. Seasoning is a treatment for bare cast iron — baking oil onto porcelain-coated grates doesn't protect anything, and it leaves a gummy, discolored film on the enamel that's hard to remove. If your grates are coated, skip this entirely; the porcelain is already the rust barrier.
- For bare cast iron grates, wash and dry them thoroughly, then rub on a high-smoke-point oil such as grapeseed or canola and wipe the surface until it looks almost dry. A visible layer of oil bakes into a sticky finish rather than a hard one. Bake them at 450°F for an hour, then let them cool in the oven. Expect smoke — that's the oil polymerizing, and it's the point of the process — so run your range hood and open a window before you start.
What you’ll need
- A mildly abrasive cleaning product
- Hot, soapy water
- Soft-bristled brush or damp cloth
- Straight pin, needle, or wire
- Screwdriver
- Baking soda (optional)
- Distilled white vinegar (optional)
Step 1: Prepare the stovetop
First, check that every burner knob is fully off, and make sure the grates are completely cool before touching them. Then lift the grates off — cleaning them is much easier away from the stove.
Most grates usually just lift straight up. Each burner likely has its own grate, and you may also have a center cooktop grate.
Next, remove the burner caps. Some models may require you to use a screwdriver to loosen them, while others lift right off. You may also have drip pans on your stove — remove these so you can clean them as well.
Step 2: Soak the grates and caps
Check before you soak. Bare cast iron will rust, and so will porcelain-coated grates with chips or cracks where the iron is exposed. If either applies, skip the soak and go to Step 3, cleaning with a damp cloth and a baking soda paste instead.
If your grates are coated and undamaged, soak them and the burner caps in hot, soapy water for at least 20 minutes.
Baking soda method: If soaking your grates in a dish soap mixture doesn’t do much, you can boost the cleaning power with a baking soda mixture. Mix 3 parts baking soda to 1 part water. Then cover the grates and caps with it for at least 15 minutes.
Vinegar and baking soda: For even more cleaning power, you might try a vinegar and baking soda mixture instead. Feel free to also sprinkle baking soda directly on tough stains.
Dishwasher method: Check your owner's manual first — most manufacturers advise against putting cast iron grates in the dishwasher, coated or not. Dishwasher detergent is harsh on porcelain enamel, and any chip in the coating will rust. If your manual does permit it, use a normal cycle rather than a heavy-duty one, and dry the grates by hand immediately afterward.
Step 3: Scrub away
Once everything’s done soaking, it’s time to wipe the grates with a soft, damp cloth or soft-bristled brush. Never use metallic scouring pads or steel wool to clean your stove. These are too abrasive and will scrub off the protective coating.
For lingering grime, spread a baking soda paste over the stains, let it sit 15 minutes, then work it with a soft brush. Distilled white vinegar helps with hard water marks.
Don't use commercial oven cleaner on grates or burner caps. Most are lye-based, which etches porcelain enamel and corrodes the aluminum parts on some burner assemblies.
Step 4: Rinse and dry
Rinse everything you’ve cleaned with fresh water, then dry the grates with a clean cloth. Rinsing the grates removes any lingering particles and clears away all cleaning liquids.
Step 5: Clean the burners
Hold on, you’re not done scrubbing yet. You still have to get to the burners on the stove itself.
Using the same cleaner and cloth you used for the burner grates and caps, clean all the nooks and crannies of the burner base. For clogged burner ports — the small holes around the burner head — start with a soft toothbrush or a can of compressed air.
If a port stays blocked, check your owner's manual before going further: manufacturers differ on whether a straight pin is acceptable, and enlarging or reshaping a port changes the gas-to-air mixture. Never use a wooden toothpick, which can snap off inside. If brushing doesn't clear it, call an appliance technician rather than working at it.
Once done, wipe down the burners with clean water and a soft cloth. Then let the burners air dry completely — give them at least an hour, and longer if they were soaked.
Step 6: Put it all back together
You’re almost done cleaning your gas stove. Now comes the challenge of reassembling everything. Before you reassemble, make sure every component is bone dry. This isn't cosmetic: water on a burner cap or igniter can prevent the burner from lighting, and moisture trapped against cast iron causes rust.
Start with the burner caps. Check the bottom of each cap to see whether it has a label for which burner it belongs to (some do, but not all). Certain burners also have pins on the edge that help you push the cap back into place securely. When it’s on the right way, the cap shouldn’t wiggle or slide around.
Putting the grates back on is a little easier, since most just sit on top of the stove. Just make sure you’re using the right ones on the right burner.
Smell for gas before you test anything
If you notice a sulfur or rotten-egg odor, don't light a burner and don't touch any electrical switch — turn the knobs off, open windows, leave, and call your gas utility's emergency line from outside.
If there's no odor, turn on one burner at a time and check the flame. It should be mostly blue, steady and even all the way around. Yellow or orange flames, or an uneven ring, point to a clogged port or an air-mixture problem.
If a burner won't light, turn the knob off and reseat its cap. Don't click the igniter repeatedly — gas accumulates each time. If it still won't light or the flame looks wrong, shut off the gas to the range and call an appliance repair technician.
Download the Thumbtack app to find local pros
Now that you know how to clean a cast iron stove’s grates and burners, the real question is: do you want to?
It can take a lot of elbow grease to do it the right way. And you may not have the time or energy. That’s where Thumbtack comes into the picture.
We can help you find a cleaning professional in your area who’d love the challenge of deep-cleaning your stove. And if your stove requires repairs, you can find top-rated appliance technicians near you as well. Download the Thumbtack app today to get started.
How it works.

Search.
Browse profiles, see prices and use filters to find pros who match your project.

Chat.
Contact the pros you like to discuss project details.

Hire.
Check pro availability and book appointments right in the app.
Find local pros for your project
Tell us what you're looking for and we'll show you pros right for the job, with prices.